
initial thoughts.
A few weeks ago, I had the chance to gaff for the upcoming documentary on Jim Hurley. He is a local politician who was pretty influential, and has a pretty big fan base. He is older in age now, but him and his wife are staples of the community.
The setup.
I had the chance to also DP this day, so I was able to really dial in exactly what i wanted to do. For this setup, i knew the project wasn’t going to be super dramatic,(honestly it’s more of a promotional piece, or a biopic, so the lighting style would not be super contrasty). My goal was to go for a 1:4, that way the neg would still be pretty prominent. I debated about having both Jim and his wife Wally’s interview setups in the same location, same setup, but i felt like they will be heavily featured in the film, so having two different setups will add to the overall production value, especially since i purposely put them on opposite sides of the frame.
Here is what i got:
setup #1
setup #2
The breakdown:
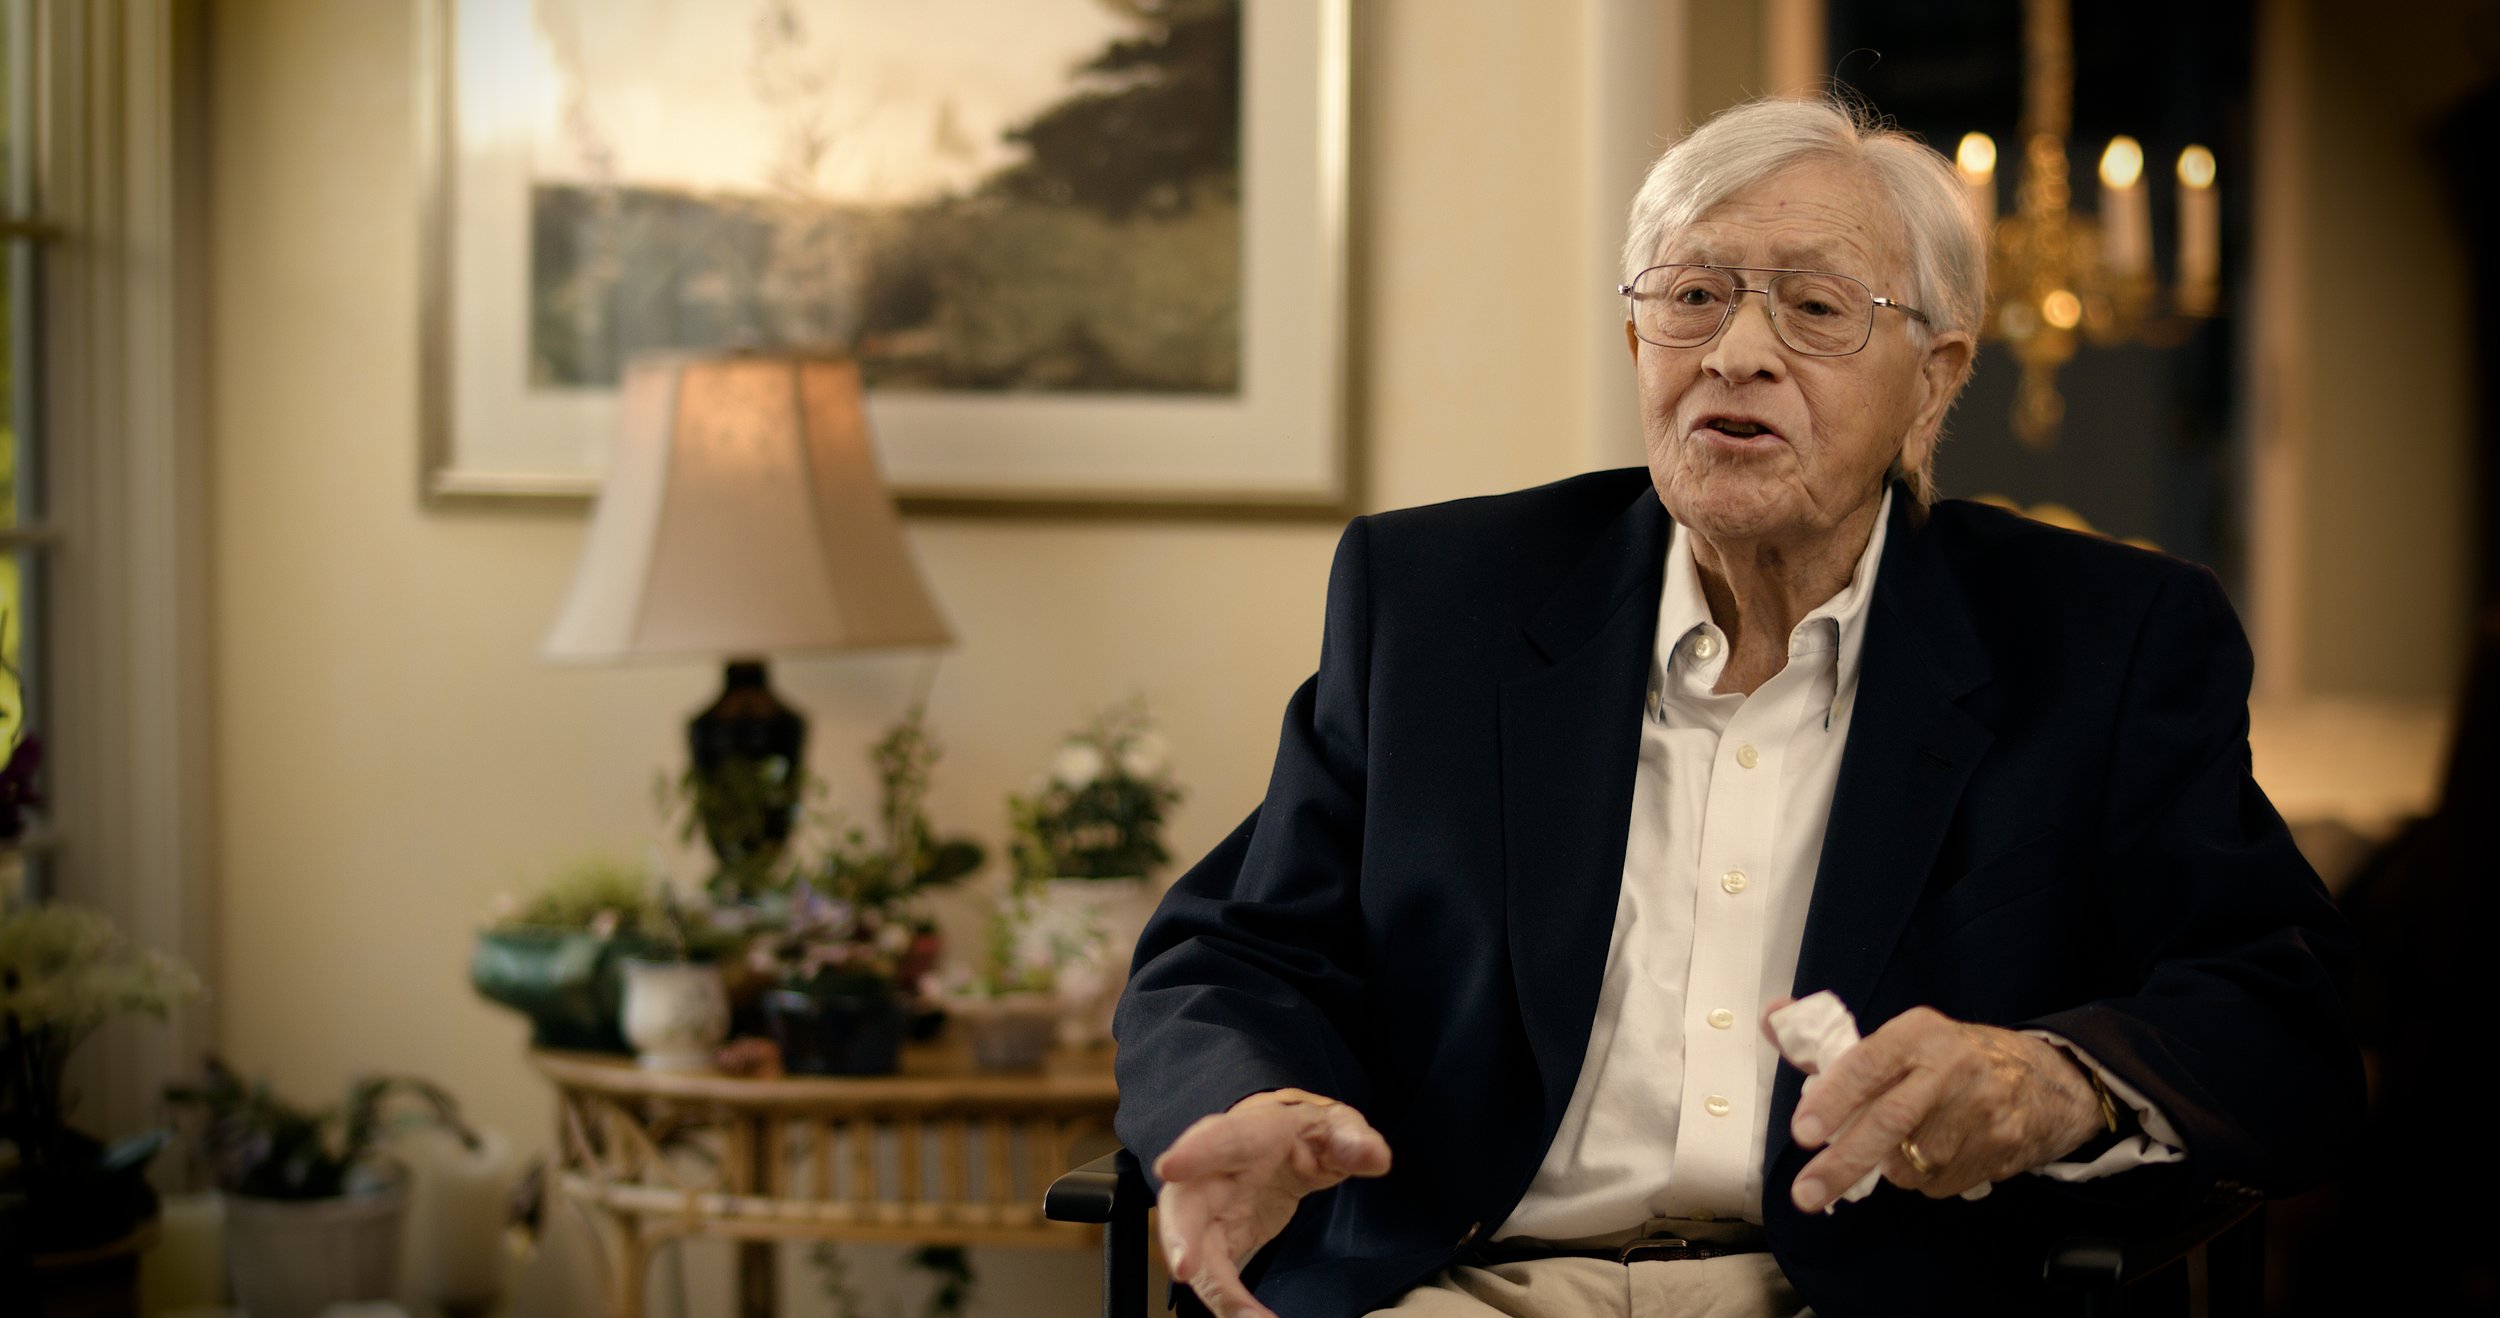
Let’s start with setup #1, since this was the first setup of the day. Here is the topdown of the setup:

setup #1
Starting from camera, this was a pretty basic set up. With the powerhouse of light blasting from the key, i was able to use the built-in ND filters of our cameras to keep the aperture open and fast, we were shooting at a t/1.5. ISO was set to the native(800) for the C200, and of course shutter angle was 180. I went with a wb of 5600k, because i knew that i was going to use 2 practicals to make this setup feel warm.
the key lights here are both at their natural, 5600k balance, and is used in a book light setup(bouncing off a foam core into a silk) to give a nice large soft source. Like i mentioned earlier, i did not want to have anything less than a 1:4, so i brought in a 4x4 black floppy on the fill side to bring in that neg fill, but kept it at a distance to keep detail in his shadow.
Something i began to notice was his hair color was blending with the cream/white color of the walls behind him on screen left, and he needed a hairlight. I brought the p300c outside, and pointed it directly at him, however, i was getting some unwanted flaring in the lens, so i added a 3x2 cutter to block part of the light from hitting the camera.
moving on to the practicals, the lamp there is actual using a b7c aputure bulb light(i swear this is not a apurture ad, lol). I had the balance set to a nice 3800k to give a nice warm light. Believe it or not, the chandelier behind Jim has real candles in it, which added a beautiful color to the background. However, i wanted a bit more control of the intensity of the source, so i added a p300c with a foam core bouncing 3200k at the celiing right above it.
Lets move onto the next setup.

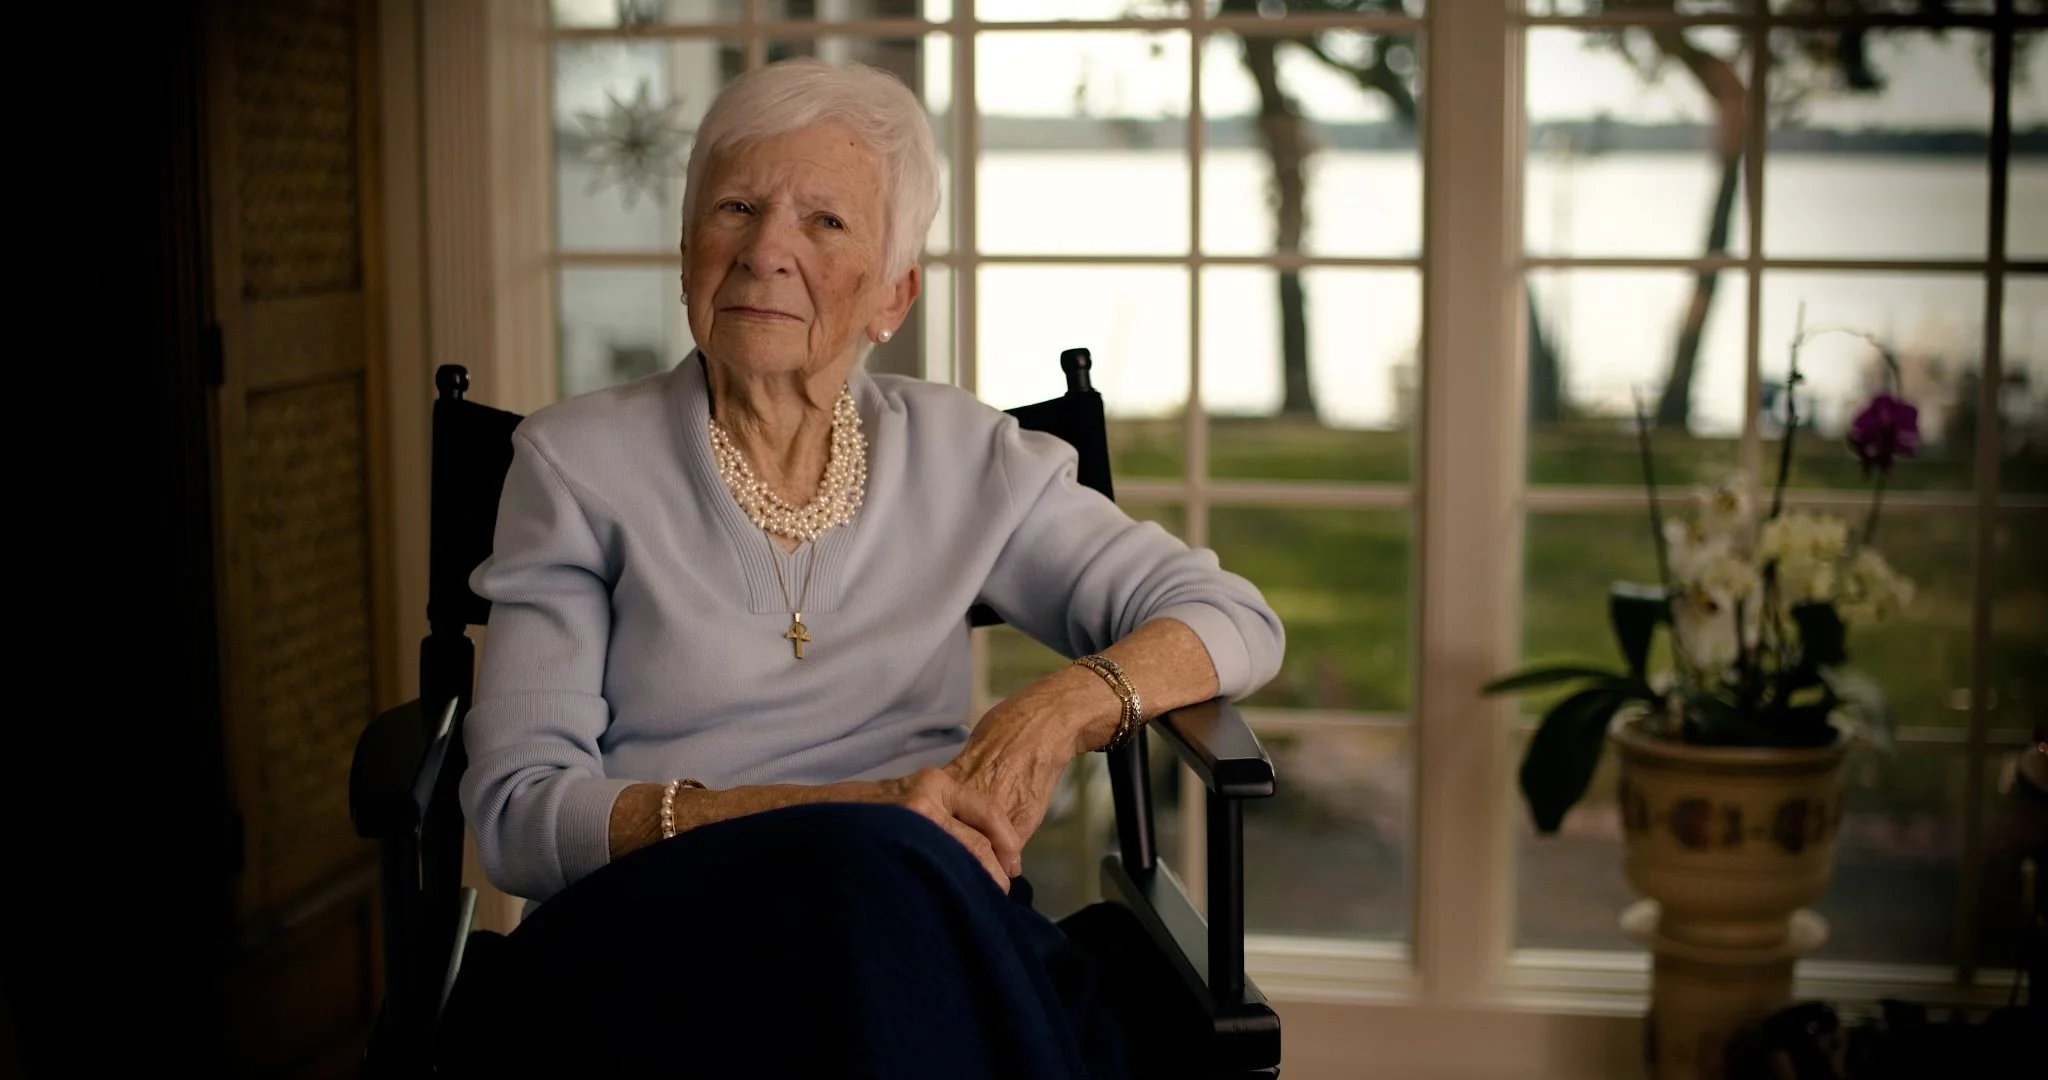
setup #2
Ah! Every gaffers worse enemy, shooting directly into windows! But i don’t want to get ahead of myself.
camera here is the basic same philosophy, and i’m not reinventing the wheel here. Same settings, same specs, same everything. I wanted these 2 setups to feel different, but still part of the same project. T/1.5, ISO 800, 180 degrees, 5600k. Woo.
I actually really enjoy shooting into windows, or using them heavily in my setups. I cannot stand to see blown out windows, and i feel that the dynamic range you can create using lighting(and shadows) really takes the final image up a few notches. However, not sure if you noticed, but the sun is very bright. In setup #1, there was no window shown, so i really didnt need to have (2) 600Ds, i just did. In this case however, i needed as much power as i can to outperform the sun. Luckily, i have inverse-square law on my side, and i was able to do so with the (2) 600Ds as well. Recreating the book light for that nice large soft source, and adding neg fill on the fill side to bring that ratio to a 1:4 but not too close to the subject to keep details in the shadows.
moving outside, i wanted to do something with the nova i had outside. I decided to add a bit of depth to my background by pointing it towards the cabinet on far screen left. This added some nice color, but also gave the composition a “oh this feels warm” look to it.
final thoughts.
Overall I am very happy with the outcome from this. Setup time was about 1.5 hours on each, because of such tight quarters, we also had video village set up for the client, and a spaghetti sdi cable land coming from it. I think the biggest takeaway for me on this shoot day was that sometimes, even the simplest of ideas, need to have some heavy ambition to get the look you want to achieve.
Could it work with less?
Sure.
Did it work better with more?
Absolutely.